Bush Babe’s pikelets
It is a rare thing when I skite about my cooking ability. Don’t get me wrong – I adore food, can hold my own with entry-level Italian dishes and consider myself ‘passable’ in the kitchen. I have to be – it’s a darned long way to the nearest takeaway restaurants. (Except for the Thai place in our little town – which can match it with the Big Smoke any day and whose lady chef I am officially obsessed with.) But any kind of ‘serious’ cooking I leave up to blog cuisine experts like The Pioneer Woman, Bakerella and Not Quite Nigella.
One thing I DO cook reasonably well however, is that great Aussie staple, pikelets. So this morning I tweeted that I had cooked up a whole mountain of them – a triple batch – to keep the troops and visitors sated for the next day or so. Instantly, it came to my attention that certain people (hello Ree!) don’t know what pikelets are. And I cannot let that be. So for the third time in the history of this humble bush blog, I shall share a recipe.
Pikelets (for all those living somewhere OTHER than Australia) are like fluffy little pancakes. They are quick and easy to prepare and cook (and eat!) and utterly delicious. And everything should be in your pantry. Why not try these out on your loved ones… don’t be scared… even I can make ’em!
BUSH BABE’S PIKELETS
PREPARATION
- Heavy-based frying pan
- Flat spatula
- deep bowl
- whisk
- large serving or dinner plate
- paper towels
It is also an idea to keep the phone nearby and get kids to help – once you start, you can’t stop when it comes to cooking pikelets!
INGREDIENTS
- 2 eggs
- 1 ¼ cups milk
- 2 tspns lemon juice or white vinegar
- ¼ cup castor sugar
- 2 cups self-raising flour
- 2 tablespoons cream
- Pinch salt
- Dob of butter for pan
METHOD
1. Add some lemon juice or vinegar into milk and set aside to sour.
2. Place sifted flour, sugar and salt into bowl and mix with whisk. Make a well in dry ingredients.
3. Break eggs into a small bowl and mix roughly with fork before pouring into well. Add soured milk and cream. Use whisk to gently combine all ingredients and continue to stir until smooth. The final batter should be thick but not gluggy. (Technical cooking terms used there.) Add more milk if yours fall into the ‘too gluggy’ category.
4. Heat up butter in pan until melted and sizzling. The temperature (hot but not burning) is very important for the best result, so be prepared to have a few dud pikelets at the start. (A non-stick pan is helpful here)
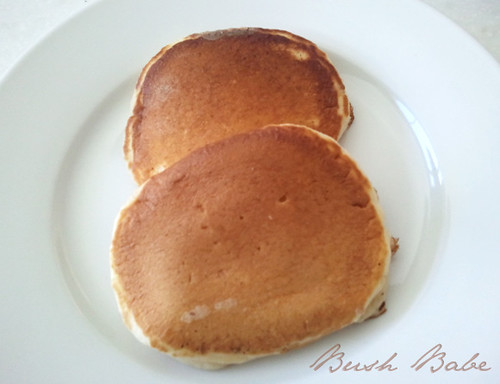
5. Drop small pools of pikelet mix (I use a jug to pour) into pan allowing reasonable space between each one. Turn only when bubbles just start to peep through each pikelet. Allow a similar time for second side before removing to plate to cool. Pikelets should be honey brown and smooth, if the pan is hot enough. (NB Too much butter will cause an uneven colour to result. I tend not to replace the butter as I cook – if the pan is at the right temperature, you won’t need more butter.)
6. Slide onto large plate when done – I use a paper towel under the first batch and have two layers of pikelets between each sheet of paper towel to prevent them sweating too much. The pikelets are best used immediately, but can be refrigerated for a few days and warmed slightly in a microwave before serving.
SERVING
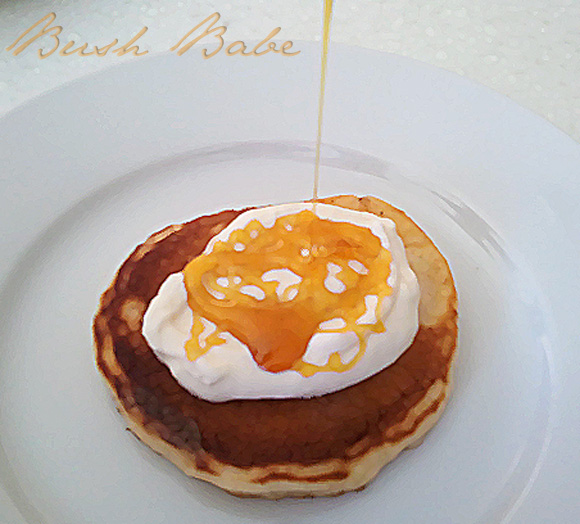
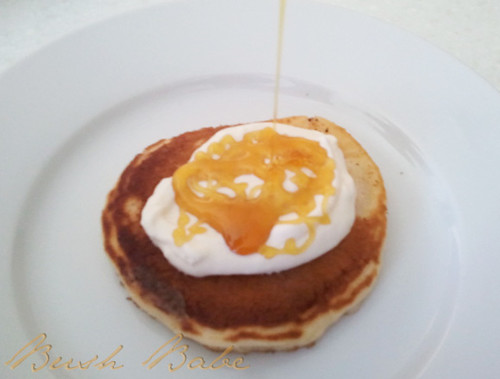
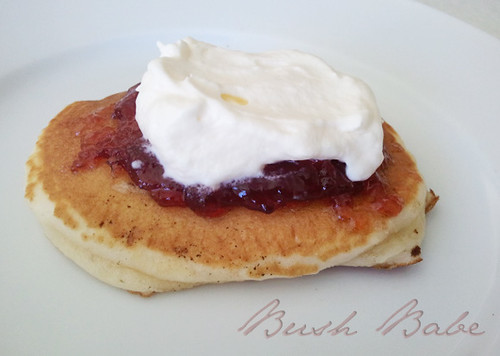
This is the most important bit – deciding how to serve them up! They are best with good coffee or tea at ‘smoko’ – I tend to whip up a batch of cream when the pikelets are fresh and offer a choice of plum jam and golden syrup for guests.
If they are being packed for school boxes or men’s lunch eskies, I slather with butter and jam and ‘sandwhich’ two together.
+-+-+-+-+-+-+-+-+-+
1. Try these out and let me know how you go…
2. If you have a different version of the recipe, please share in comments…
3. Forgive the terrible food photos. They are taken on my new mobile phone as I have left my download cable in Brisbane. Aaargghh!

19 Comments
jen
Am not at home so can’t compare my recipe to yours but I know mine has some maple syrup in it. I like them just with butter on top, or even just by themselves. Yummmmmm.
Amanda
Yum!
Amanda´s last blog post ..Dear Darl- it’s October 15 Thank God it’s Friday
debby
So. Pikelets = pancakes.
I see.
Do you ever add fruit to yours? Like blueberries?
debby´s last blog post ..Today at Tractor Supply
Bush Babe
Only in the way of jam or preserves… they are bit thicker than pancakes (or the ones I have experienced are anyway) and only 2-bite size. Anyone else??
Mimi - SleeplessInKL
When you first mentioned pikelets, I really thought it was some fish dish. There *is* a fish called pike, right? 😉
They really look yummy, even with a phone camera. Must try it one day. I’m a Nigella-Lawson-homemade-pancake-mix type of girl: http://www.sleeplessinkl.com/2008/11/07/make-your-own-pancake-mix
CeeCee
Based the addition of vinegar, they sound like our buttermilk pancakes. When we are in a pinch and don’t have any buttermilk around, we add vinegar to our milk.
They look wonderful with jam and whipped cream. I’m not much of a maple syrup fan.
CeeCee´s last blog post ..Smokie- in Stereo
A Novel Woman
Boy was I wrong. I thought they were tiny Australian fish. Well, the Brits eat kippers, right?
They look yummy.
A Novel Woman´s last blog post ..Joel Burns Bares his Soul
Bill
BB, Thanks for the new word(esky). You are one of the reasons I get up and out each day. The wife’s broom handle is another reason.
Bush Babe
Oh Bill – it’s 4.30am and I needed that giggle – so ‘back at ya’!! Too funny.
🙂
BB
Kelly
They look delicious!! ….but what is “castor” sugar? (I guess I could go google it)
Kelly´s last blog post ..Favorite Five – TV Game Shows
Bush Babe
Kelly, it’s white sugar that is more refined… perhaps you call it something else??
🙂
BB
Maev
Caster sugar….(US) Superfine sugar…
Just in case someone else peeks in…
I have lotsa US chat friends…my Aussie speak makes ’em giggle…*G*
Rhu
BB, the USAliens may know them as sweet blinis.
Yum, pikelets…
debby
I’m not an alien. You guys are. Austr-aliens. Bwahahahhahahahahaa!
*walks off chuckling to herself*
BB? don’t ever begin insisting that your commenters be mature and all that. I’d never be allowed to comment again.
debby´s last blog post ..People
jeanie
Mine doesn’t have cream in it – apparently the poms call them “dropped scones”…
jeanie´s last blog post ..Hey ho- hey ho
Lydia
They look super- yummy! I think I’m going to have to try them out on my son when he comes over for dinner next week…..
Thanks for the idea!
Miato
Hola,
ЎIncreнble! No estб claro para mн, їcуmo offen que la actualizaciуn de su nombre de bushbabeofoz.com.
[url=http://www.hosgoho.com/]Miato[/url]
Franklyn
Thank you, I have just been looking forr information abnout this
topic for a long time andd yours is the best I have found out till
now. However, what in regards tto the conclusion? Are you
sure in regards to the source?
Franklyn´s last blog post ..Franklyn
Maev
These are like mini hotcakes (US)
Jam = Conserve…